At this point in your video project, you’ve established the messaging and purpose, as well as the style and vision. You’ve written the script and created a shot-list. The pre-production preparation for your business video is nearly complete! Now it’s time to start PLANNING FOR THE SHOOT. Here are some quick tips to ensure your video shoot day is a success!
The Location Matters
- Choose a Brand-Friendly Environment: You’ll want to make sure the setting of your video or the subject’s background visually connects with the story being told. Strategically, this should include showcasing your brand’s colors, products, props, or what you do in a visually pleasing way.

- Less is More: While your location should be consistent with your messaging, too much in the background can be distracting. Remove any clutter.


- Check the Acoustics: Make sure the location you choose is quiet enough for recording audio. Be aware of your surroundings and identify what may create unwanted noise in your video.
- Avoid Lighting Hazards: Bad lighting can ruin a video. Be aware of glaring overhead lights, windows, flickering or discolored fluorescents, and other light sources that may negatively affect the look of your video.

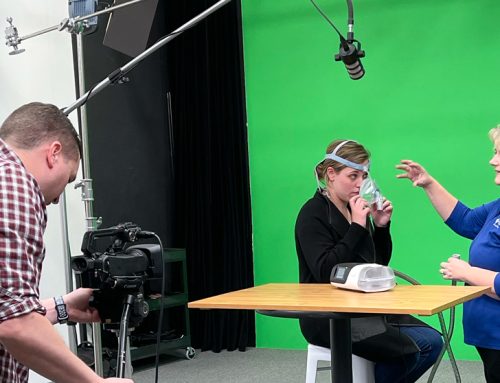
- Use a Green Screen: If your space doesn’t have an ideal location to shoot your video, film against a green screen backdrop. With post-production software, you can key out the green and add in the background of your choice.


Composition is Key
- Consider Best-Practices for Subject Placement: If your subject is talking directly to the camera, position them in the center of the frame. When your subject is talking to an interviewer, use the Rule of Thirds. Position your subject “off-center” toward the left or right third of the frame with the negative space in the interviewer’s direction. Consider the Rule of Thirds in product placement as well for a more appealing look.


- Fill the Frame: Get close enough to your subject or product to fill the frame, removing unnecessary and possibly distracting negative space.

- Add Background Depth: Position your subject away from walls, props, and other background materials. This draws focus to the subject and helps make the visual much more interesting.

Equipment Must-Haves
- Choose the Right Camera: If your goal is to shoot professional-looking videos, use a professional camera. Mobile devices with higher quality cameras are an alternative if used properly.
- Control the Lighting: While professional equipment is best, you may be able to get by with lamps or shop lights as an alternative. The tip here is, be sure your subject is well lit and separated from the background.
- Consider Teleprompters or Cue Cards: Either can be a great tool and timesaver for long scripts and help pace your speech. Teleprompters are available as apps, or you can substitute by using a laptop or cue cards. If your subject is talking directly to the camera or “viewer,” position the prompter or cards as close to the camera lens as possible.
- Use a Tripod or Monopod: These simple camera tools will keep your shots smooth and steady. They also add controlled movement when you want to pan or tilt in your scene.
- Use Dedicated Audio Equipment: Viewers won’t tolerate bad audio, so making sure you have the proper tools to capture sound is a must-have. Using external mics with headphones for monitoring will help ensure great audio and a clear message.
- Rent Needed Equipment: Renting is an affordable option when you’re not ready to invest in professional equipment. We’re happy to share and recommend our source, Lensrentals, at lensrentals.com.
Choose the Best Talent
- Find the Right Person with the Right Qualities: Characteristics like confidence, sincerity, concern, and other emotions are important when considering your lead talent. They should be able to speak clearly and articulate your message. We recommend auditioning internal talent before committing!
- Have a Creative Director on the set: Creating video is a team effort. Your camera person and talent will need encouragement, direction, and/or constructive criticism to ensure the quality and vision meets or exceeds expectations. Before calling it a wrap for the day, the footage should be reviewed, approved, and reshot if necessary.
- Plan your Hair, Makeup, & Clothing in Advance: Avoid shoot day disasters! Communicate with your talent whether you are providing a stylist or if they should arrive “camera-ready.” Consider wardrobe as another opportunity to showcase or emphasize your brand.
Practice Makes Perfect
- Review the script Ahead of Time: Give enough time to provide feedback and become familiar with the content. If you or your talent wait until shoot day to read through the script, it may cause delays or be too late to address any questions or concerns.
- Practice Until You’re Comfortable: If you’re already reviewing the script, practice/rehearse and see how it feels to say your lines. Suggest changes if necessary, so the words flow as you would normally speak. Appearing confident, sincere, and natural is critical to your performance. So… practice, practice, practice (makes perfect)!
- Set up a Full Equipment Rehearsal: Standing in front of the camera with audio and lighting equipment pointed at you can be an intimidating experience. A full rehearsal before shoot day can help shake any on-camera jitters. Take this opportunity to make sure you have all the necessary equipment and everything works.
Conclusion
While it is not feasible for us to cover all aspects of video production in this short post, we hope the above tips help your shoot day run as smoothly as possible, and the result is a great video. Please feel free to contact us with any questions, suggestions, or how we may help you with your next project.


